DISCLAIMER: Below I created a tutorial on ‘flashall’ method to get up and running with this firmware. I include 2 outside videos at the bottom for those who prefer GUI applications for upgrading firmware.
Modem recovery firmware available here, in case you mess up.
FLASHING MODEM FIRMWARE
Before following below, make sure to first install adb / android-tools. Required for ‘flashall’ script.
(see below screenshot to see above commands in action. Make sure to download the package.tar.gz into the ‘helpers’ directory, to allow ‘flashall’ to make use of it.)
After this, you will notice the modem going ‘down’. Then it will reappear / come back alive (reboots).
If you get an error, it can’t hurt to try ‘flashall’ again.
Just be sure you have android-tools / fastboot, and extract Biktor’s firmware into the same directory as tools/helpers (the location of the flashall script).
When all is successful, you should see a message from a dedicated number telling you about the success of your new modem firmware.
Notice problems with modem disappearing? Take a look at recommended settings here.
UPDATE: OUTSIDE VIDEO GUI RESOURCES BELOW
In this article I opted to share a quick commandline route.
For those who prefer a GUI tool (to upgrade the firmware), below I embedded 2 videos on this.
Scroll down to take this route.
RELATED: FIRMWARE UPDATER ON POSTMARKETOS
(Below offers 2 separate videos on the same tool – watch whichever you prefer.)
Who Should? For the few who love the idea of a Linux computer terminal in their pocket, more than they do a phone.
With a keyboard case, you can achieve over a full day of battery, carrying an additional 6,000 mAh charging battery. Placing your Pinephone into the keyboard case, allows it to attempt to charge via the pogo pins.
(there are some drawbacks to the keyboard case: you have to be careful not to attempt to charge the usb-c on the Pinephone, while it is plugged into the keyboard case)
Outside that, I would only recommend to the most hardcore of Linux nerds. Those who want to be part of the Linux mobile development process.
Too many Android users expect the same performance, apps, battery life… those people are surely to be disappointed.
On the Linux end, most apps you run on your desktop can run on the Pinephone.
On the other hand, without Pine64 creating an affordable Pinephone (original) project, we would not have near as large a Linux mobile community.
Purism also has played a big role in Linux mobile development, with Phosh (interface shown in video).
Should you get the Pinephone?
This is something only you can answer for yourself.
If you have no interest in development process, it’s probably not for you (at this point).
Pinephone has been my daily driver for 2 years now.
Covers various (historical + present) backdoors found in hardware (including this week’s latest Asus motherboard UEFI firmware backdoor:”CosmicStrand”).
Important for both indivduals, gov, and small businesses to be familiar with the risk.
It doesn’t mean all ‘backdoors’ (ex: test accounts) are put there for ill intentions. Large networks require remote access, and server management.
It’s nothing new.
Intel AMT Briefing
Many are still unaware (most) computers come with 👾 Intel AMT (active management tech), a proprietary, remote access backdoor (has legitimate purposes, but by definition, acts as backdoor).
There are legitimate purposes, but functions mirror that of a hardware backdoor implant.
Computers with ME, can’t hold power without it: removal by design is very difficult (if not impossible – depending on hardware), remote access hides from PC owner’s purview). If you attempt to remove it completely, your PC will not power on for long.
HAP Bit
‘HAP bit’ (see me_cleaner), once set, partially ‘neuters’ Intel ME. Reportedly a solution for agencies who needed to meet the bar for a “high assurance platform” (HAP bit does not work for all models).
‘Normal’ customers are generally left with no choice in newer Intel with AMT / vPro model computers.
Newer computers are completely dependent on Intel ME co-processor. Remote communication OOB (Out-of-band), being most concerning
Why so few options for Intel models without? It’s worth asking.
Others might not be aware of servers (ie: cloud rental) having 👾 IPMI BMC hardware with remote OOB (out-of-band) access: in truth, this should be expected for large server mgmt – make sure you trust your providers. But it’s still not common knowledge to the average person, so I mention it.
What about 👾 Computrace? Familiar? Aware of Lojack? Computrace is another ‘backdoor’ styled security feature, covered in the video. It looks, acts, and feels like a backdoor for those performing system analysis (as the video shows).
Learn about the above and more, in today’s latest video.
(support original content: options – sharing, reposting links to content is the best way)
Could there be additional persistent undocumented features inside ISP routers?
You could like the idea of a simple, single board computer for routing at home, and at the office.
Avoid ISP routers – many problems over time, new innovations can add attack surface. Find another router (router advice towards bottom).
INFO: ISP’s in USA since 2017 have been legally allowed to sell customer data / identifiers “without explicit consent.” Other countries may vary in their data protection, but (in my option), we should assume abuse of this exists in the data broker industry.
(not all ISP’s reported to do this)
TIP: encryption helps prevent (potential) malicious redirection of personal devices.
DETAILS / MITIGATION EXAMPLE
Blocking hardware related backdoors locally (from local OS) won’t likely result in a plausible solution.
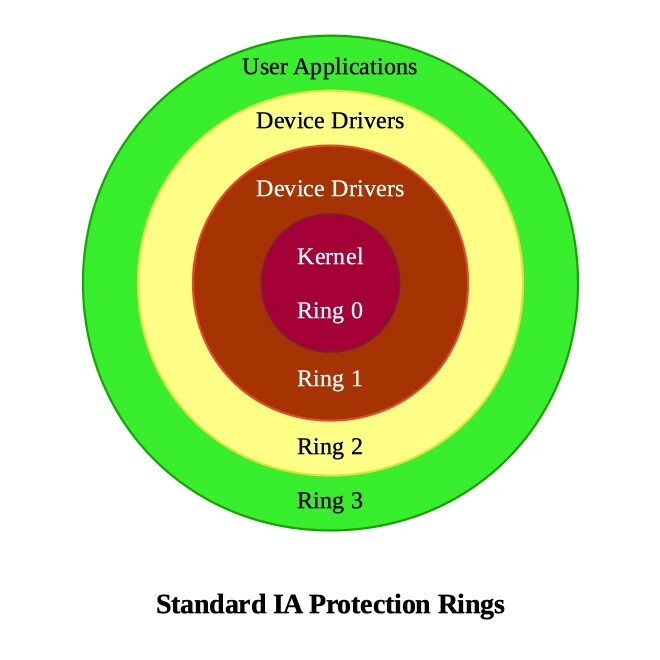
RING LAYERS AND SCOPE
The rings represent layers of privilege. Kernel, at the center (below), has access to everything outside of it. Repeating per ring.
Take Intel Hardware Example Here…
INTEL MGMT ENGINE RING LAYER (-3)
Additional rings add privileges that otherwise wouldn’t have existed, for ME, at Ring -3.
Meaning it has privileges over everything outside of it.
Intel ME runs at highest privileges, completely outside oversight (ie: Windows, Linux).
In some cases we may be able to mitigate, through a series of creative choices (where possible).
Use information you have on backdoor pathways / communication to mitigate on LAN.
One mentions in this example (see video): AMT requiring either built in Intel AMT capable ethernet, and / or Intel WiFi with OOB / TCP / IP stack. Otherwise an AMT capable device.
Alternative connection methods can become one of those mitigations.
Another option (depending on the backdoor location, access) would be reflashing (where applicable).
More Intel AMT options collected for the community, see: This Post.
Router Advice
I have been asked “what router to get”? Routers play a key role in home / business security. Devices will be guided, (“routed”) by your router. They can (also) be redirected (maliciously) by a router.
Choose carefully.
On the hardware end: if you aren’t DIY, and want something “ready to go”, see hardware reviews, search relevant vulnerabilities.
Sometimes a backdoor is not necessarily placed intentionally. It could be a single rogue employee, or other placement between you and the manufacturer.
Also: Watch out for counterfeit routers.
ex: July 2022: Arrest in scheme to sell Cisco Counterfeit routers – Florida Story
“Cisco Partners Sell Fake Routers To Military” Read Story Here
If you choose to buy a new router, 2 established projects trusted in the FOSS Community are Open-WRT firmware and PF Sense (FreeBSD based). Both provide controls for networking (read reviews; do a bit of vulnerability searching on hardware).
TIP: reputable hardware vendors, with strong FOSS community backing are your safest bet when looking at mass manufactured hardware.
(see if they have a forum; look for reviews inside FOSS community)
Or, you might choose flash one yourself. Either a single board computer, or one supporting Open-WRT firmware / PF Sense, or other choice.
related: Working on improvements to router related img. Sometimes shared with followers as a “surprise download”, or “thank you” to regular supporters (work in progress).
🎉 Nextcloud Hidden Service ‘Updater’ Command (Initial Share)
Interested in Nextcloud selfhosting: this post is for you. If not, feel free to skip this post / script.
⚠️ NOTE: Tested / Written for commands / locations / services on ‘privacybox img’, Nextcloud automated hidden service setup (currently existing as a “thank you” to regular supporters.
SUGGESTION: Back everything up before trying (at this time). Comments welcome. 👍
📁 UPDATED (Aug 7th, 2022): Now creates backup, and more attuned to run more than once.
Hopefully this helps those interested in selfhosting Nextcloud.
Why Selfhost? One of the top ways to truly have control of your (and friends) data / privacy, is to run the hosting server hardware yourself.
While cheap virtual hosting brings forth plenty of convenience, renting server space from strangers does not ensure data privacy rights online (ex: unless volumes are ‘pre-encrypted’ locally before uploading).
There are some cases where cheap hosting can be a perfect solution (say a personal page, public blog, or small business – things you want public), and then there are more personal things (like storage, routing, communication) where you want as much control and knowledge on who can access, and / or modify our data.
Selfhosting is the best suggestion for storing personal data.
Get started in Selfhosting posts section. Suggestions for future content welcome.
Why This Script?
Recently a friend in the community asked if there were plans for upgrading Nextcloud hidden service in a more automated fashion. I had been considering working on this already. Having been acustomed to upgrading on the commandline.
Today sharing an (early draft) automated script solution with everyone. 🎆 Making upgrades easier.
(cautious: may not match other setups locations, commands, and files if you have a different Nextcloud setup. I may make it a more universal Nextcloud upgrade script in future revisions.)
✅ UPGRADE NEXTCLOUD: UPDATER COMMAND
Upgrading Nextcloud:
See Issue #1 (At Gitea Onion: Use Tor Browser To View)
Previously implemented Debian automatic upgrades service (turn ‘on’ and ‘off’ within boxshell menushell).
One thing missing has been upgrading Nextcloud in a more straight forward way. This script is an early draft at fulfilling that feature.
Today I finished the initial first draft of a tested Nextcloud Updater command.
💾 Check out an ‘early’ release ‘updater’ command here (view in Tor Browser)
Stuck Upgrades?
Traditionally, there are a few ways to upgrade Nextcloud. One place is within the web interface itself.
At times, steps may ‘get stuck’ (common issue). Some of this relates to built in default timeouts, size, and access restrictions, or even excess files not recognized by Nextcloud, etc.
The idea here is a simple, single use command, assisting the process along, backing up, and escaping potentially stalled upgrades.
⚠️ WARNING: Strongly recommended backup before trying something new that makes major changes, especially in regard to server upgrades. When dealing with automated upgrades (tested a couple times), depending on software changes / variance, it’s not always going to have the same outcome.
Certain times you may try upgrading a version “too far ahead”, where server software is not properly aligned to take on a far advanced upgrade (version).
I’m simply saying: it’s a good idea to back things up, just in case. 😉 But this has been tested a few times on a test server.
Plan: Add additional safety checking.
Install Updater Command
Once you download it in Tor Browser (or use git clone), you can follow the 3 commands below to add the script as a new shell command:
Intent on putting more ‘safety checks’ into more finalized revision (in future). Use cautiously at this time. Tested on a test server.
Running ‘updater’ More Than Once?
Each time the ‘updater’ command is run, Nextcloud downloads and installs the next available (ahead) upgrade version.
You can run the updater command a couple times to check for yet another updated version (in testing, I was able to upgrade twice finishing up with Nextcloud 23.0.7 [stable]).
Keep in mind future versions of Nextcloud are not guarunteed to support applications from previous Nextcloud versions. Eventually, most apps catch up.
TIP: Keep dependencies up to date to make sure you grab the newest Nextcloud possible.
This script / command should be used as your own risk. Once again, I encourage backing up (script performs some of this temporarily, but never hurts to have another, longer term copy (may add this)).
💓 THANKS FOR HELPING GROW THIS CONTENT
No pressure, but one tip to help content creators you like is by sharing content on social media / ‘trending’ comments sections.
There will be a followup talking over the final Argon One case setup.
This case + SSD board is an excellent option for those interested in selfhosting Nextcloud, or other personal servers.
See my Selfhosting Playlist for more ideas, including a personal tip on beginning your Nextcloud as Hidden service, a shortcut.
Added Note: The Argon One is also a recommended solution for those who get the Supporter Privacybox img. This ‘privacybox’ img includes fully automated custom setup for your brand new Nextcloud as Tor Hidden Onion Service (with added anonymous chatroom options). Including generation of a new Onion address + private key, as well as your own Privatebin “zero knowledge 256bit AES encrypted pastebin” (and more, coming soon).
Learn more about the supporter image at the Gitea onion here (open link in Tor Browser). This image is currently existing as a present to thank Supporters who buy 6 ☕☕☕☕☕☕ total coffees over any period of time (or equivalent donation in anonymous Monero and / or Cashapp).
It’s a concept to help support my demonetized tutorial / public interest work, and will continue to incorporate new original design concepts in the setup.
Thanks for watching and be sure to share this video with others interested in learning about selfhosting! 🙂 I appreciate your help sharing any of the videos you find helpful.
Looking forward to helping everyone learn more about selfhosting and running your own servers, coming up.
We will also be taking more looks at Linux and Pinephone in next few videos. Stay tuned and be sure to Follow here for the latest in tips and tutorials.
Feel free to leave questions and comments. Look forward to reading them.
You can view the Gitea Onion server in Tor browser, and optionally work on projects from TailsOS, Whonix, and other torification.
There I host various things I am working on, from open free proxy, frontend lists, free books, and code. As do others (you are welcome here).
It’s completely FREE to sign up to add / upload your own projects (public or private – they stay how you choose).
There is no forced copilot submissions for projects here.
You can also browse and download whatever you like as a guest, without ever registering.Anonymously.
I wanted to provide an anonymous git service (that respects your privacy) for users who may not want to reveal identities as seen on places like github.
You can use it from TailsOS / Whonix terminal, or add torify to your git commands on any other Linux operating system. Try it out.
I feel anonymity offers us the ability to share open ideas without users worrying about self censorship, or being ‘doxed’. And that’s what I’m trying to do here.
I feel anonymity offers us the ability to share ideas without self censorship. And that’s what I’m trying to do here.
Encouraging new users to ask questions, file issues (if you have them), and check out what I and others are working on. Feel free to contribute too!
Those who want to support the Gitea onion and other public interest works, can find details here.
For those following shortcut playlists such as Nextcloud as a Tor hidden service (see selfhost playlist example), or who support the Supporter image.
Really, I hope this post helps anyone interested in selfhosting. Whether or not you support my work I make these posts for everyone and welcome followers, shares, monthly members and ☕ coffee (if you like). End of post includes “present” idea for regular supporter incentives.
I really appreciate all my followers (thank you! 🙂) and try to make public all I can, as able. My goal here is to help.
Selfhosting
Steve Wozniak is right. He has had quite a bit to say about Cloud computing, and the mistake it is for those who care about their privacy.
It’s important to differentiate: when we say “the cloud is not your computer”, we are NOT talking about a physical server you own and can touch! We are talking about remotely hosted cloud space you RENT.
THAT is not your computer. And you have no control over who or what is accessing it beind the scenes. It’s better we act like it.
iCloud is an example of NOT your computer. Any rented virtual server / cloud space is NOT your computer.
“Never trust a computer you can’t throw out a window”. -Steve Wozniak
I love that quote. It’s really that simple.
If you, yourself setup the physical hardware (or purchased from someone you trust), THAT can become the (only) “cloud” server you trust.
Nothing less is ensured private. If you can’t control the hardware, you don’t control the outcome.
Options include something like Nextcloud on a Raspberry Pi or Pine64 / other singleboard computer. THAT can be a server you can trust (trust as long as you know what you are doing). A server you own.
Listen, rented cloud storage is NOT your computer! I’ve been stating this since the first days of this channel.
(Thought it can’t hurt to say it again)
When you rent cloud / virtual hosting, you can’t think that is truly private, right? Because it is not. There is nothing private about rented cloud storage.
The cloud is not your computer. It is rented space on a computer, but it is not your computer.
Other people can access it. Employees of the company. Potential attackers. Snoops. Misfits.
Who really knows who else?
If you are going to rent cloud space, at least encrypt that data ON YOUR PC, BEFORE sending it to said cloud. Use something strong. If you want to ensure no access to the data within.
One interesting test is attempting to upload something that has been encrypted independently (such as with zulucrypt). Certain cloud providers have been reported to outright REJECT encrypted files.
If you are going to use rented cloud storage, at least encrypt your files before uploading. Try it.
Let me know in the comments if your encrypted file is rejected. I would love to hear the story! 😁
Sponsors (No Conflicts Of Interest)
I don’t have sponsors. It’s why I don’t recommend many companies (like, ever). If you want to help with content here, I accept coffee, XMR, cashapp. All options listed on frontpage.
Not saying it’s a bad thing to have sponsors. Not at all. I enjoy channels who have sponsors! And I’m really not here to make anyone look bad.
But it’s always smart to do your own research if a channel or writer benefits from recommending a product. It’s common sense.
Take for example someone may recommend cloud / virtual hosting specifically for privacy. It’s always a good idea to find out if they are benefiting from this recommendation.
And if they are benefiting, research further to find out if there is a better option (my only aim is to provide answers, and otherwise hope to stimulate free thought).
I wish all creators the very best, and only change my own recommendations based on what I know to be true.
I’m not saying there is anything wrong with virtual hosting / cloud rentals. Not at all!
In some cases it might be the right decision for you.
But for peak privacy capability (if this matters to your threat model), alas, it is not.
You could benefit from this if you simply wanted to host a small business presence on the web, without concerns for privacy on that server.
I’m telling you all this because I’m happy to tell you the good, the bad and ugly.
Some people want to set everything up from scratch. I totally get that (it’s the best way).
One example is the common recommendation “create your own VPN” for privacy.
This isn’t a great idea.
Obviously Tor / i2p / lokinet (and other multilayer randomized meshnets) will be superior to any VPN alone.
Creating your own VPN on shared cloudspace may leave you as one of the only users to be seen.
That’s less “needle in haystack” layering blend in with a single hop of separation.
This doesn’t mean you can’t combine VPN with Tor to enhance some cases. But ensure you are doing this correctly. A VPN is tied many times to a user’s identity. And it’s best to avoid this when a user’s goal is anonymity.
I’d rather recommend proxychains as an additional option for journalists, lawyers, and others who need anonymity without over complexity.
But, for the vast majority of people, Tor Browser alone (with a bridge) is simple and secure enough.
I’m still feeling a bit rough, but glad I cranked this one out. Hopefully will get more done soon. Hope you get something out of this article, and see you in the next one! 🙂
THANKS TO: REGULAR SUPPORTERS (If you fit this reach out so I can share current img)
For those interested in a more ready to use all in one Supporter Image I am working on: offers fully automated selfhosting setup (automated new Nextcloud Tor hidden service onion + private key generation (only you have the private key / onion as it doesn’t exist until you first login) + Privatebin “zero knowledge” pastebin + onion Tor wifi router + additional menu shell and customization options + more unique ideas implemented soon).
The Supporter selfhosted pi image is something unique I’m happy to continue to improve and maintain. Carrying custom options not mentioned. Goal is to offer something unique. A matter of selfhost convenience focused at privacy options, setup automated (initial setup asks only for wifi network preferences, network cards etc and takes care of the rest, displaying your newly generated onion address).
Currently offered as a way to say “Thank You” to those who ever bought (over any period of time) total of 6 ☕ ☕ ☕ ☕ ☕ ☕ coffees (or equivalent Monero/XMR, cashapp donations), + offered to those who joined membership for 6+ months. It’s also available as an “extra” service here for those who just want to donate to download (accepting monero and cashapp donations here).
If this is you, please let me know. I’m excited to share this with you! 🙂
It’s something I came up with to incentivise supporting the unsponsored, demonetized tutorials / videos (over 182) and other works. I want to be able to continue expanding on ideas, public offerings, and improve content quality, + have the opportunity to share more servers with everyone. I can only meet all goals with some support of community. To those who have, thank you. ❤️
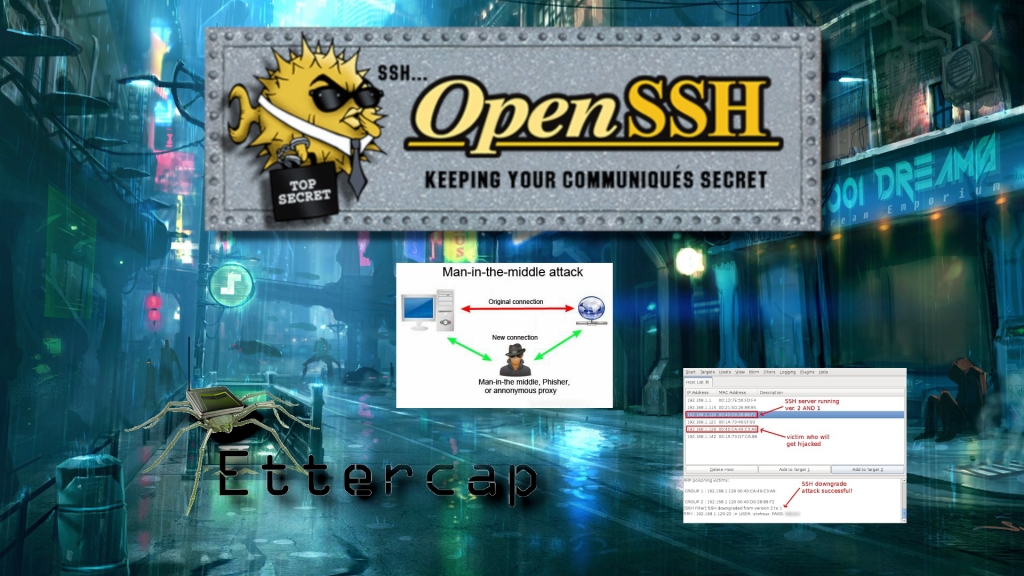
Learning to check SSH fingerprints is a staple for using remote ssh safely. Failure to match fingerprints opens us to potential MiTM.
[ Did you miss ssh writeup Part I? We discuss how default Linux OS hostnames can sometimes give away default password, pitfalls in numerical passwords (changing default passwords should be priority #1).
First we identified the OS by default hostname, then we used a “most common numerical pin number wordlist” to crack the default SSH password in seconds, demonstrating how successful ssh cracking (using Hydra) looks, and offering solutions/advice HERE) ]
INTRODUCTION
Do you accept “new” ssh client key fingerprint prompts without checking them against the server in question’s own key fingerprint?
If you accept ssh key fingerprints (without verification), you may be setting yourself up to be an unwitting victim of a MITM (Man In The Middle Attack).
[This topic is covered in PART II (scroll down for Tutorial]
Additionally in PART II, we swap out weak default password authentication, to a much stronger (passwordless) RSA key authentication login assisted by ssh-keygen (we use to generate strong keys).
After which, we disable the password login option altogether (to prevent brute force attackers), and finally, we restart SSH for all changes to take effect.
As a Bonus, a video covers converting SSH server to a Tor Hidden .onion service, adding additional security/encryption benefits (without need for open ports).
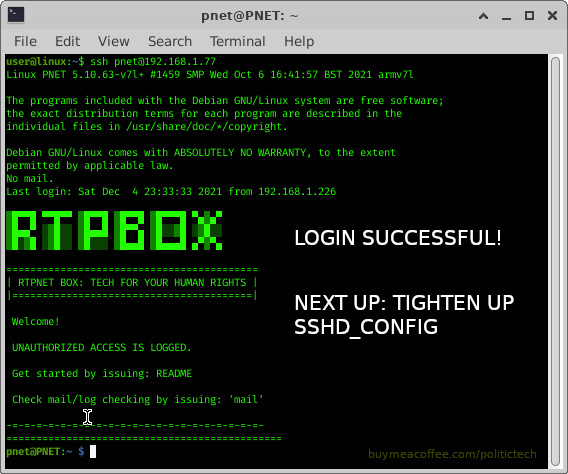
(REFRESHER) PART I:
Part I video is below, covering weak default password examples in real Pinephone operating systems (applying to all Linux / UNIX machines / default logins).
In this scenario, we first scan machines on the LAN (as an attacker would), immediately identifying operating systems by their default hostname. After which we use Hydra (brute force cracker) to run known default username/pin number lists against the SSH server identified OS of our Pinephone.
After demonstrating how easy it can be to identify and crack SSH logins on machines sharing the same connection/LAN, we then go in to tighten up sshd_config settings to prevent future brute force attacks. As well as talk password security.
Today’s Video continues on from this SSHD Config angle.
As the introductory paragraph details, first we check key fingerprints shown by our ssh client against the server side’s ssh key fingerprint. We must ensure these fingerprints match, otherwise we risk MITM attack. Never accept new fingerprints without verifying.
ADD SSH KEY AUTHENTICATION (NO PASSWORD NEEDED)
(ssh more securely)
Have you ever accepted a fingerprint and wished to start over to be sure? (to: delete all saved keys for host / server and reconfirm fingerprint?)
REMOVE PREVIOUS KEY FINGERPRINTS (CLIENTSIDE):
ssh-keygen -R HostHere
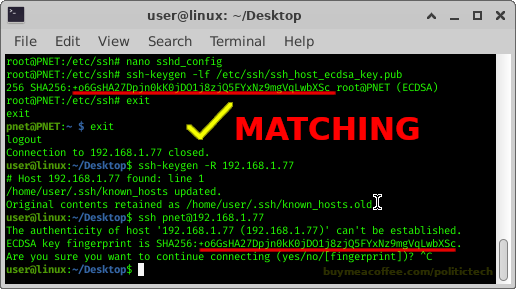
CHECKING FINGERPRINT (SERVERSIDE):
ssh-keygen -lf /etc/ssh/ssh_host_ecdsa_key.pub
NOTE: THE ABOVE COMMAND IS ECDSA. LATEST AND GREATEST ADVICE IS FOR ED25519. CHECK THIS:
ssh-keygen -lf /etc/ssh/ssh_host_25519_key.pub
NEXT:
Connect (from clientside) to our SSH server to check the fingerprint output. Does it match the above “CHECKING FINGER (SERVERSIDE)” output?
See the screenshot below to watch this comparison in action.
SCREENSHOT CHECKING FINGERPRINT (COMMANDS ABOVE):
IMPORTANT: I felt the need to explain 01:56 — do not accept the key (unless you previously recognize it). This key fingerprint acceptance is to demonstrate the plain ‘password: ‘ prompt itself (fingerprint acceptance required to show). Follow below for fingerprint checking instruction (or follow video after 3min).
TIP #1 FINGERPRINT CHECKING: Check the server’s fingerprint from a separate network (if working remotely from it), or if you have physical access + a monitor, even better. By using a separate network to check the fingerprint upon connection, you are compartmentalizing both client checks from one another, further verifying fingerprints match from multiple networks.
Running the fingerprint checking locally (serverside) is always the best method (when possible).
TIP #2 FINGERPRINT CHECKING:
write hosts/fingerprints down , post them on your wall/corkboard/office: no risk in having a written list of your machines hostname/ip + correct ssh fingerprints. This can save you from having to check.
Why? You may one day need to login from a new machine without physical access to the server. Having record can help you check without risking the login/accepting fingerprints remotely.
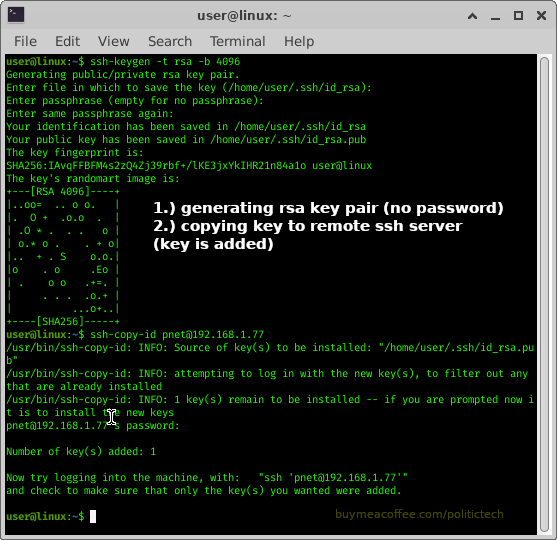
After working on fingerprint checks, we add the key to our server, allowing our client machine to automatically login upon connection.
GENERATE RSA KEY PAIR
ssh-keygen -t rsa -b 4096
PASSWORD-FREE KEY AUTH: MORE SECURE SSH ACCESS
COPY KEY TO SERVER:
ssh-copy-id username@host
SEE SCREENSHOT BELOW FOR ABOVE STEPS IN ACTION
After successfully copying our key, we then connect by ssh to test it, if it lets us in without problem or password, we did it!
TESTING PASSWORD FREE KEY AUTHENTICATION
TIGHTEN UP SSHD_CONFIG (SERVERSIDE)
We add a few more lines to /etc/ssh/sshd_config, ensuring only our machine can login: (disabling password guessing by relying on our newly minted key alone)
/etc/ssh/sshd_config:
PasswordAuthentication no ChallengeResponseAuthentication no UsePAM no
Restarting SSH allows our configuration changes to take effect:
sudo systemctl restart ssh
[Timestamps are found inside the video description]
* BONUS: PART III: Tor SSH .Onion (Hidden Service):
This 3rd (optional) video shows how to setup SSH access as a Tor Hidden Service.
BENEFIT #1: By disabling ssh locally and allowing only the Tor ssh we prevent unknown machines from attempting brute force attacks (if we failed to follow previous videos). The only ssh attempts will be from those you give the onion address to.
BENEFIT #2: Additional layer of end to end encryption between the tor clients on ssh client and server side. Add to this the ssh encryption keys/fingerprints themselves on your client/software side, and you have a much more secure ssh setup.
Comments/Questions Welcome below:
Like content/videos like this? Share it with Linux users (Reddit, Telegram, Discord, IRC).
❤️ If you appreciate content like this and want to ☕ Buy Me a Coffee hit ‘support’ button on: Home Page
Thoughts, comments and any questions welcome below.
Share this post with everyone. Leave your thoughts below.
(Share to help this grow. ❤️ ———————————————————————- PUBLIC COMMUNITY SERVERS: 🧅🔐 ANONYMOUS GITEA (.onion):Books, Code/Scripts, Wiki, more (make a repository) 🧅🔐 PASTEBIN (.onion): anon pastebin pw protect, zk-256bit, “Burn After Reading” + more ———————————————————————- 💖 🤗 SUPPORT (If you like) 🎁 EXTRAS: something unique for your Support here ———————————————————————- FOLLOW: ✍🗒 MASTODON 🐦 TWITTER 📺 🎞 PEERTUBE 📺 🎞 BITCHUTE 📺 🎞 ODYSEE 📺 🎞 YOUTUBE ——————————————————————— ✉ CONTACT ————————————————————————
Supporter Community Early Look (May 13th): Now Public (For Everyone)
(if interested in seeing posts ahead of time, check out the Supporter Site – Free to follow)
The beginning of this writing breezes through subjects found in the video (below), while providing copy and paste convenience.
Later on I begin to include a few sysctl additions that may help mitigate certain attacks.
If what’s on the page isn’t clear, leave a comment, send a message, or check back later and see if anything is new.
Learn The Basics
Get Started
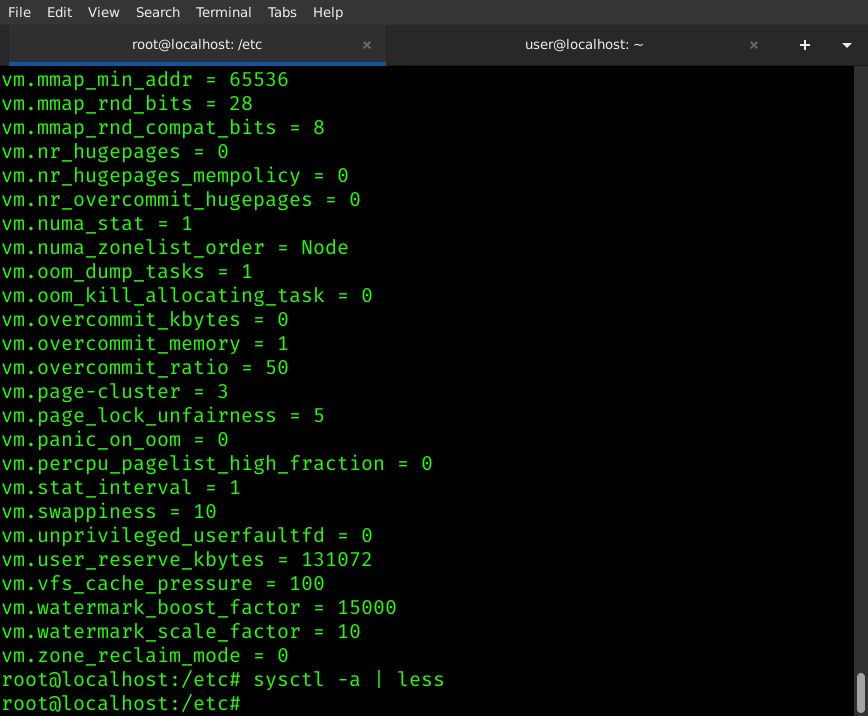
Howto: List ALL Current Values (You Can Change Any Of These)
sudo sysctl -a
Example Output Of sysctl -a:
(The above shows all possible ‘keys’ or parameters we can manipulate / configure)
Make Above List Easier To Read With ‘less’: sysctl -a | less
Test Single Kernel Parameter
We can make our changes automatically load every boot, by editing configuration file: /etc/sysctl.conf (Pop!_OS, Debian Based), /etc/sysctl.d directory location for Arch/Manjaro + )
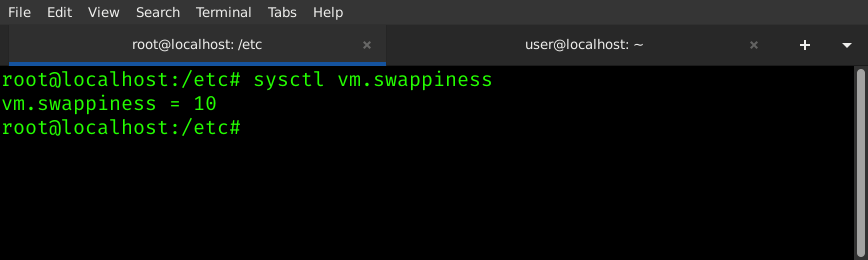
BUT… Before modifying sysctl.conf file (or file in /etc/sysctl.d), we could check individually for the variable (verifying existence).
Run:
sysctl vm.swappiness
The above command returns (if it exists) what the value is.
Example:
Note above screenshot returns my case, vm.swappiness = 10
This figure, the ’10’, represents the ‘redline‘ percentage of free memory, before activating swap.
What you say? 🤔 “swap”? Many Linux users have a partition or file aside known as the <swap>.
This “swap space” helps take the burden off your device, when hardware use is more intensive.
As rule of thumb, create swap space roughly the size of total ram.
10% free memory left before swap? 🤔
Sounds low (running out of resources can lead to a crash).
Change this to something higher, to activate swap space before 10% memory.
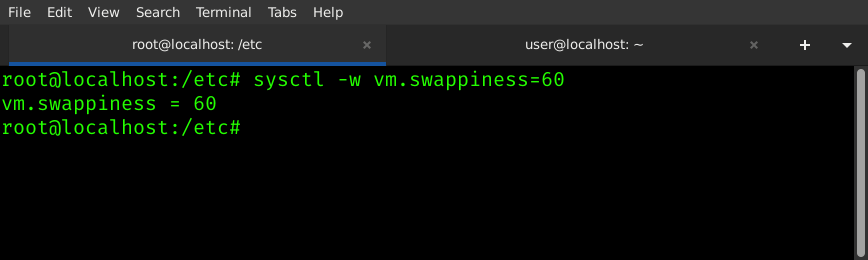
First, you might want to test out your intended line (changes to 60% free memory for swap).
It’s an easy command:
sudo sysctl -w vm.swappiness=60
Example:
What Does The Above Command Do? This changes the current wait from 10% remaining memory up to 60% memory free (when swap will be activated).
This means my older machine will be able to make use of the benefits of swap, much sooner.
Adding Settings To Sysctl.conf
You can follow the above steps to find changes you might wish to make. Write down the key and value. In our case, we need to add:
vm.swappiness=60 # careful not to use any spaces above
Our next step is adding this new change to /etc/sysctl.conf (on Debian / Pop!_OS), in order to have it start for us every boot.
OPTION #1
One method would be adding out line using VIM or GNU/Nano editors.
Just as well you could open your favorite GUI editor.
OPTION #2 (Quick Bash Lesson)
We can use a simple line of bash to add each new line easily from the commandline! 🙂
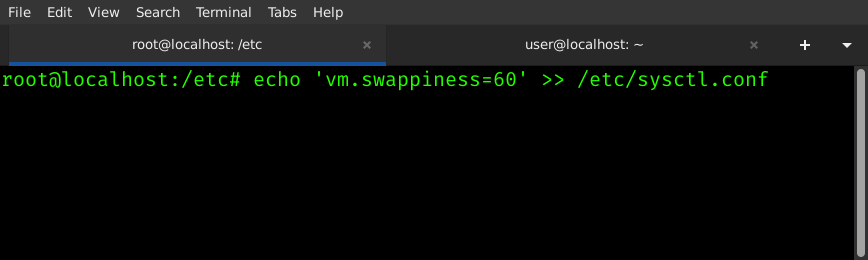
Running the following line will add vm.swappiness=60 to our /etc/sysctl.conf file:
sudo echo ‘vm.swappiness=60’ >> /etc/sysctl.conf
To Make This Tutorial Approachable To Everyone, Let’s Break Down The Command:
How The Command Works:
sudo creates superuser privileges. Anything run after ‘sudo’ will be run as root.
echo sends ‘vm.swappiness=60’ to the standard output – basically meaning echo will print the segment in quotes after to the screen
>> takes the output from previous command (echo) and sends it to the end of the /etc/sysctl.conf file.TIP: If you were to use a single > it would OVERWRITE the file. Using (2) >> APPENDS the end of a file
The filename is at the end here, preceeded by the >> which appends the location after it.
TIP: Experiment using the above information, to create new command combinations. Utilize the ‘>>’ to create new logging features for your scripts.
Adding Additional Changes To Sysctl.conf
Add as many changes as you need to /etc/sysctl.conf. Follow previous steps, replace ‘vm.swappiness=60’ with each new change you wish to add.
Questions / Comments Welcome: It Might Help Someone Else Too.
Our example change activates swap before the previous 10% memory, up to 60% to use swap.
A Few Security / Privacy Related Lines For You To Try! (Desktop – Not Router)
Or, optionally, reboot your system to load the sysctl file.
Always a good idea to test out your new options before attempting to load new sysctl options at boot (see above for testing).
I may add more to this, including more details, including at the (public) Gitea Onion..
Thank you for visiting! If you would like to help with coffee/sdcards/small hardware costs for the channel/blog, I’d love that. Either way, I sincerely appreciate Likes, Shares and Comments! Thank you. 🙂